


So about 2 years ago I felt a little ambitious and decided to take on my office cabinets, the orange-ish color laminate that wasn’t offensive, but just wasn’t my style or taste. I’d painted laminate in the past and had what I’d call so-so results. Yes, they look great right after I’d done them, but the results never lasted. What do I mean when I say the results never lasted? Always, every single time they’d end up peeling later down the road. User error? Possibly, but not likely. I know some have had success, but not me.
I decided to try something a little different by using a gel stain on the laminate and boy was I surprised at the results…2 years later!

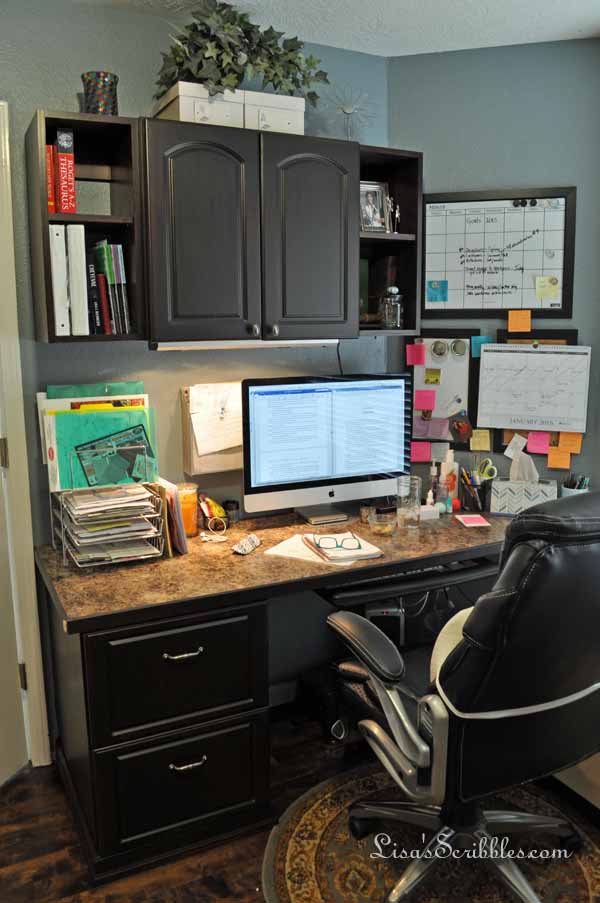
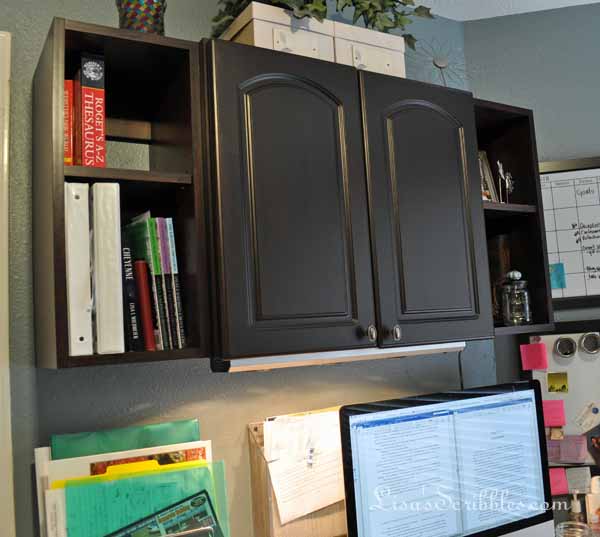
You see the date on the calendar? October 2014, that’s when I first took on the project, and yes it took a while to finish up the office because I had a big load on my plate at the time. Here’s the pic from just the other day, January 2016, and the cabinets have held up great!
Since the office was on the project list for 2016, yes I make project lists, I decided it was as good a time to finally finish it up. You’re going to be amazed at the difference a little Java gel stain can accomplish.
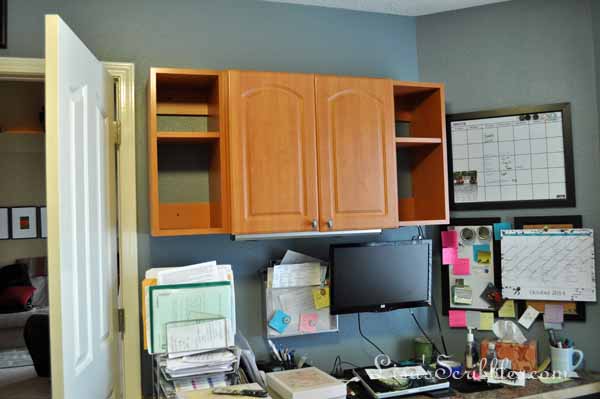
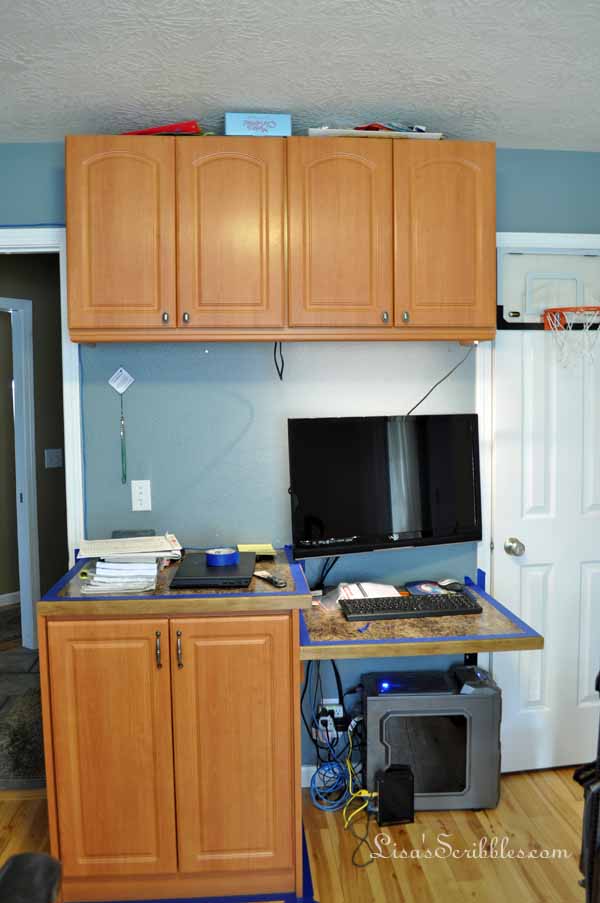

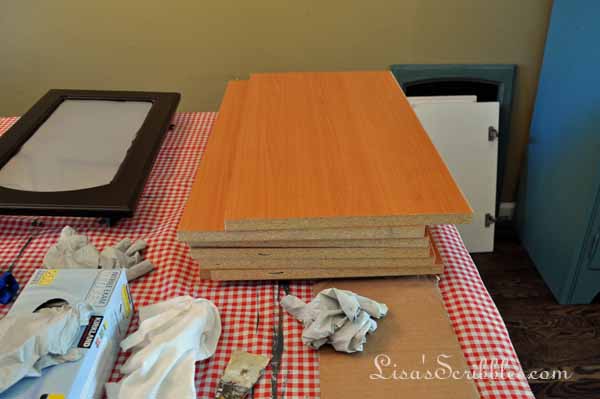
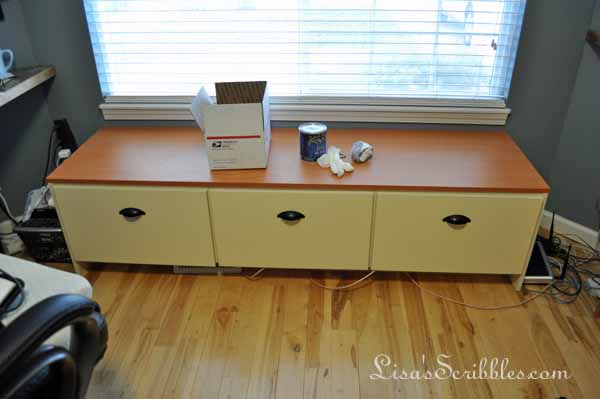
Before; your basic stock laminate cabinets with an orangish color to them. They weren’t awful, I did live with them for many years like this and was content until the idea of mixing it up came to the forefront.
It was pretty easy too, no real prep work other than making sure they were clean. One thick coat and they were done. Yup, that easy.
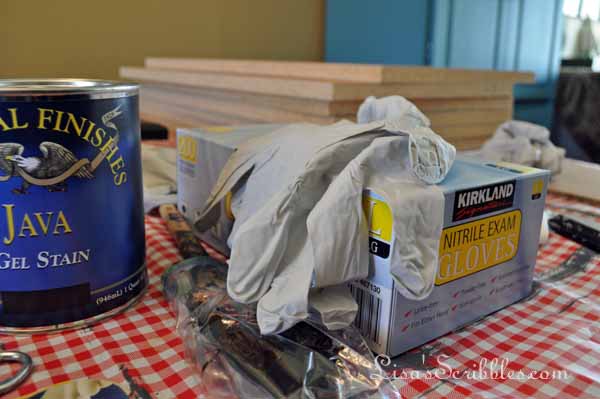
I’d highly recommend using gloves when working with this gel stain. It’s sticky, and the only way to get it off your skin is by using paint thinner or nail polish remover. I just bought a large box at Costco because I tend to go through them fast.
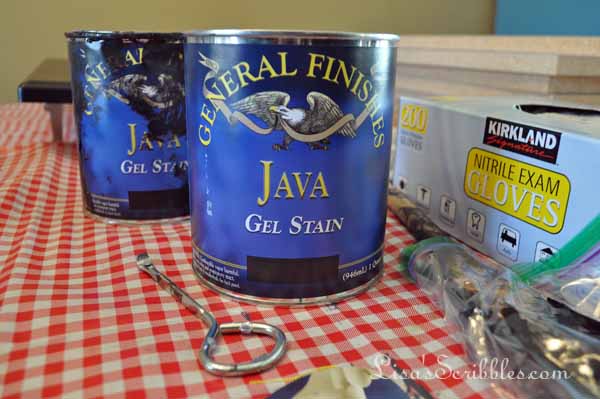
My favorite gel stain is the General Finishes brand. They’ve got great colors to choose from and a quart will go a long way. I probably used about half a can with this project, but that’s because I brushed it on thick. How you use it will vary on how much you need. You can purchase it from Amazon (yes, this is an affiliate link), but I found it cheaper locally at a wood working store.
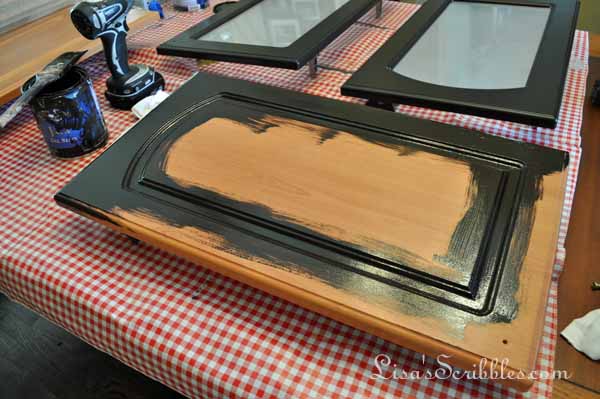
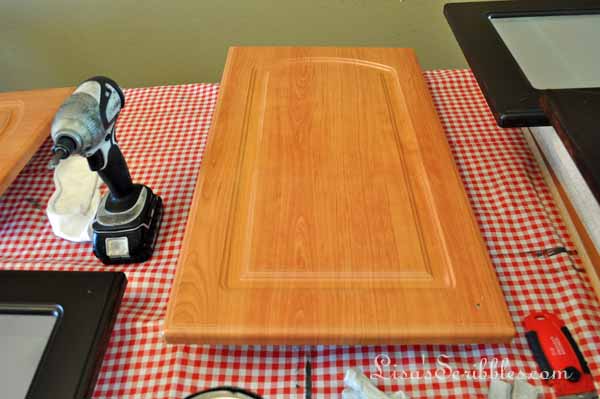
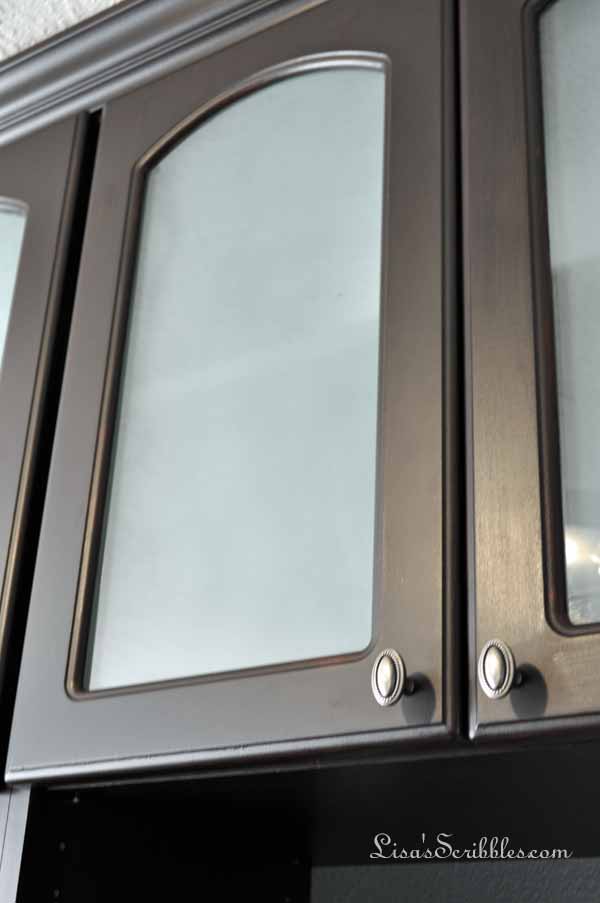
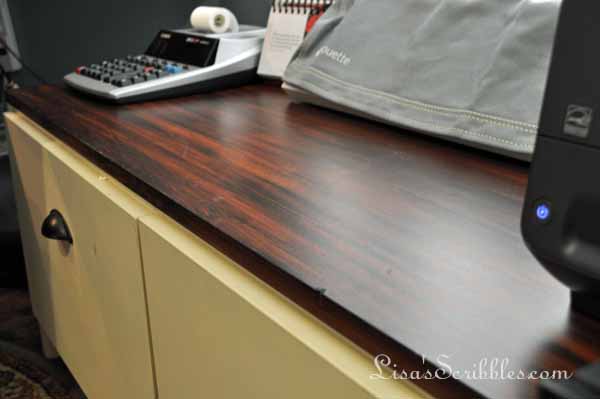
I put it on like paint, and with a light touch. I found working with laminate if I over brushed it the orange color would show through, and I didn’t want that. So light easy strokes is the best method, and even though this technically doesn’t have a true grain, you can create one by making sure your brush strokes are all in the same direction.
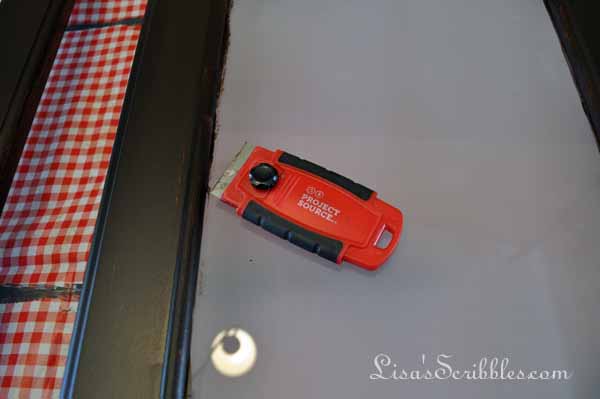
I also found that when working with glass on the doors, it was okay to get a little stain on the glass. I later went back and used a razor to scrape it off.
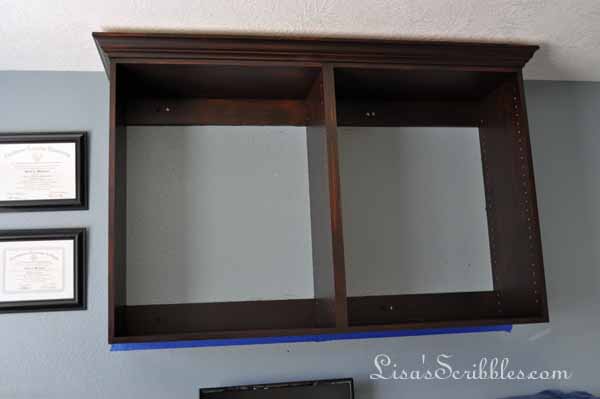
While the doors and shelves were drying, I stained out the wall cabinets.
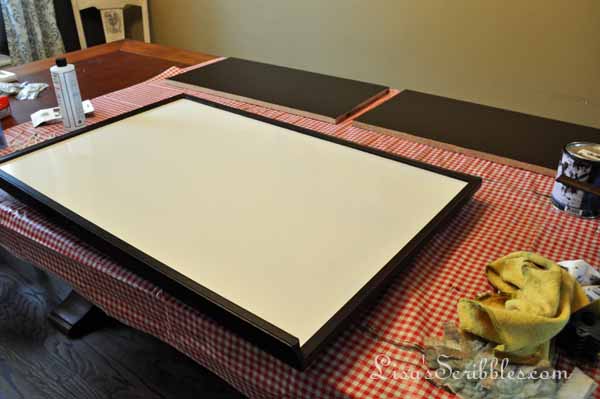
I even restained the dry erase board to match the cabinets as well.
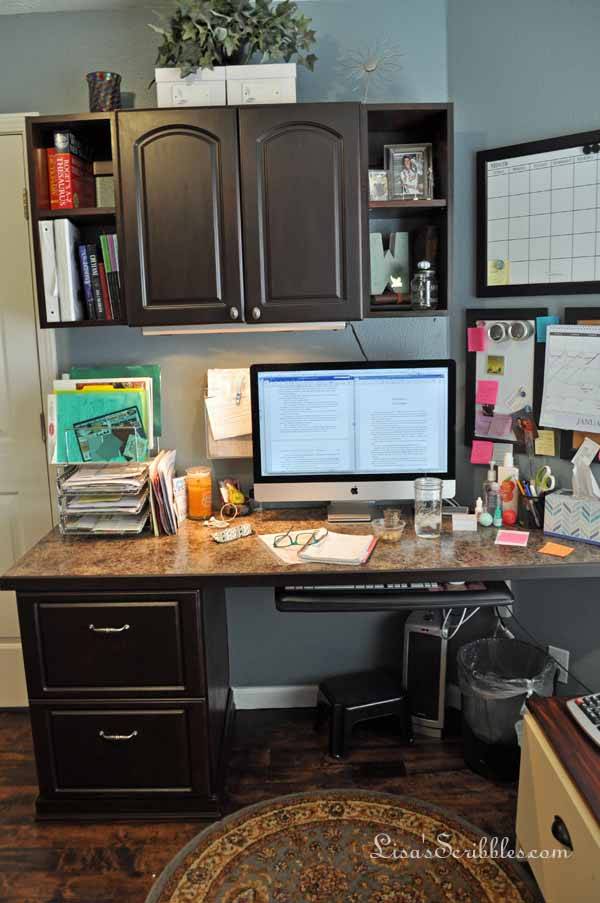
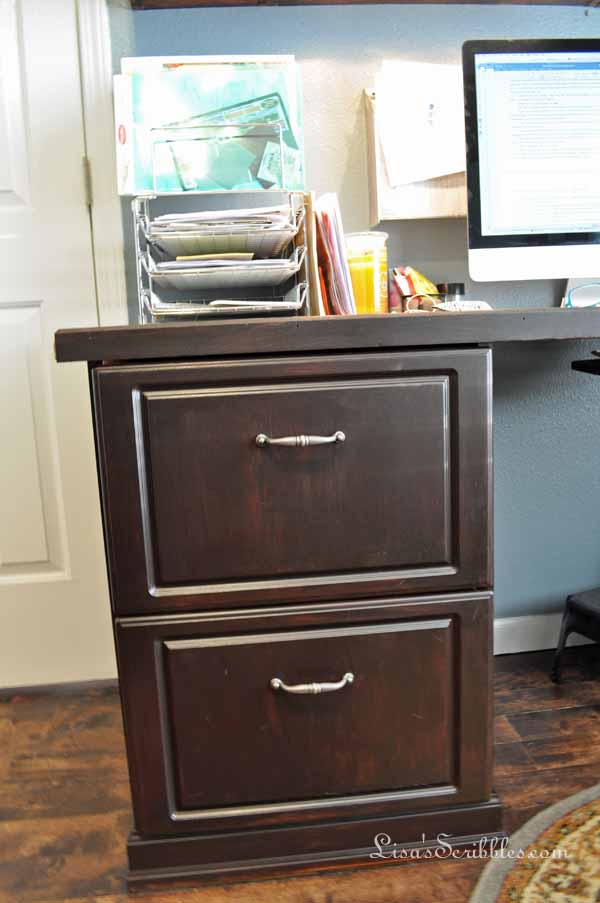
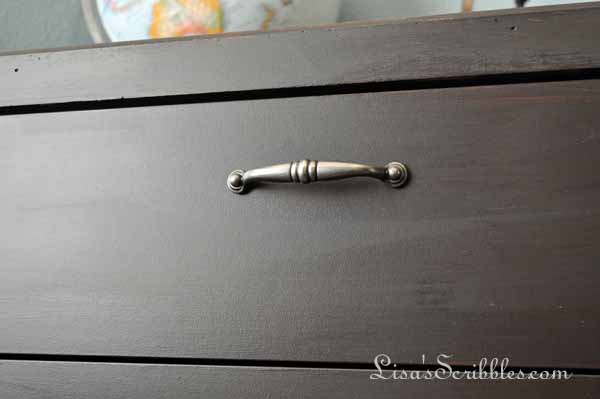
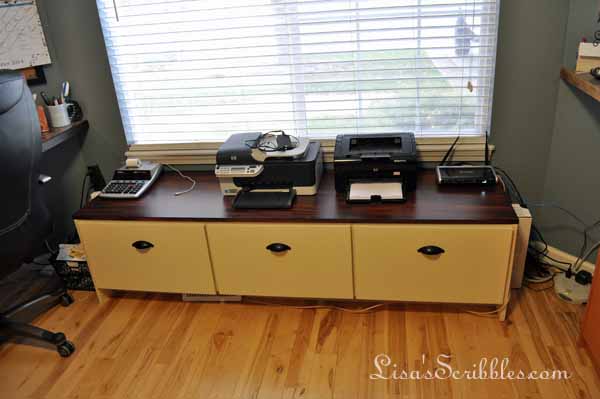
Turned out pretty nice I’d say. It gives the office a nice rich feel that makes me want to be productive while I spend 8+ hours a day in there writing.


This bench was done 2 years ago using a slightly different method. I did more of a dry brushing to give it a grained look like real wood.
Looks like real wood, doesn’t it?

And here it is 2 years later…a little dirty, but holding up strong.
One note, it takes about 5-10 days for the gel to fully cure. What I mean by that is once it’s not tacky, you can put things back together, but take care that you don’t scratch the finish. You can retouch, and once it’s fully cured you shouldn’t have any issues unless of course you accidently scrape it with something sharp, just like any other wood product.
Well, I’m off to be productive in my newly revamped office space. Wish me luck!
Toodles!

Excellent stuff, thanks for this step by step guide, I think the effect is so polished and sleek.
You did not have to lightly sand the slick surface of the laminate before staining?
I’m wanting to darken an old mid century dresser (currently that kind of blonde color) using General Finishes gel stain, followed by their Urethane.
It looks like the top is a laminate. I had planned on sanding it lightly to try to slightly roughen it up a bit. But if you didn’t, and yours has held up, maybe I won’t have to.
Thanks in advance for your advice!
Sorry for the delayed reply, but for some reason I didn’t see your comment until now. In response to your question, no I didn’t sand the laminate, I only wiped it clean. Gel stain is great for projects like this because there is less prep work than with traditional painting or staining. It’s held up well as I’m in my office 8 + hours a day 7 days a week. I’m loving it!
Thanks Lisa! I forgot I even asked you a question!
I got the email notifications today and saw my question. I thought, “Oh good, that sounds like my issue! …Oh wait! That’s me!” Lol!
Since I’m a procrastinator I haven’t started the project yet. My husband coincidentally just told me today, “No more excuses!” (usually I say it’s too hot out—and it is!) “I’ll set it up for you tomorrow so you can get started”.
lol! You’re cracking me up! One note, if you want it dark like I did mine you’ll want to use a brush to apply it thicker. You’ve also got to be careful of brush marks too, although they tend to fade away the darker you go. Put it on like paint and you should be good to go. 🙂 Can’t wait to see your finished project, you’ll have to send me pictures after it’s done. And most importantly — wear gloves! This stuff is sticky and if it gets on your hands the only way to remove it is with paint thinner or nail polish remover! Good luck!
Lisa, how do I send pictures? I don’t see an option in the comment area.
I have two other projects I’ve done with General Finishes I could share. One was a “curbside” pick-up — free. The other was from FaceBook Markerplace for $30 —too much. Had to reglue, restaple, etc., so it wouldn’t fall apart, lol. My current project is that MCM dresser, with the possible laminate top, I got for $20, agsin off of Favebook. Solid brass hardware. Bought Brasso brass cleaner hoping to clean off some tarnish. (I suppose some would be upset that I’m staining a blonde MCM darker? It was someone’s grandma’s wedding bedroom dresser 1947. While the quality of the build is nice, it’s not great, so I’m not feeling too too guilty)
So sorry for the delayed reply! For some reason, I’m not getting notified, which is a bit frustrating as I’m not always logged into this site. Anyway, if you want to send pics then email them to me at authorlisalwiedmeier@outlook.com and I’ll get them! Excited to see your finished projects. 🙂
Wow youre quite ambitious.. i can learn from you. I want to paint my kitchen cabinets white but the job feels daunting ..did u at any time during your project think what u were doin was time consuming ? I love your writing style ! 🙂
Thanks for commenting Jaye, and this particular project wasn’t as time-consuming as other’s I’ve done in the past. I would say it was one of the easier ones since there was little prep work involved. I made sure the cabinets were dust free, I didn’t have to worry about much else since they’ve been in my office. If they were my kitchen cabinets…then I would have had to clean them a little more thoroughly as I have boys and boys aren’t very clean or neat in general. lol About 10 years ago I painted my kitchen cabinets while the hubby was away on a 2 week trip to Europe, that was a bit more time consuming. When you’re painting kitchen cabinets prep work is everything. First you sand them, just enough to scuff them up, then you prime them (mine were oak), then you paint 2 coats, and then you seal. There’s a lot of door flipping and you’ve got to have some space to work. I did mine in the garage in November and it took longer for them to dry then it would have if the weather were nicer. In 2014 I remodeled 4 homes, they were our former rentals that we were selling, and in two of them I painted the cabinets, another I used the gel stain. They all turned out beautiful. You can find them if you search for Kingswood remodel, and Wanna be Remodel on my site. I hope this gives you inspiration, and you need some one on one help, just use my contact form on the site and I’ll help out as much as I can.
9 Comments